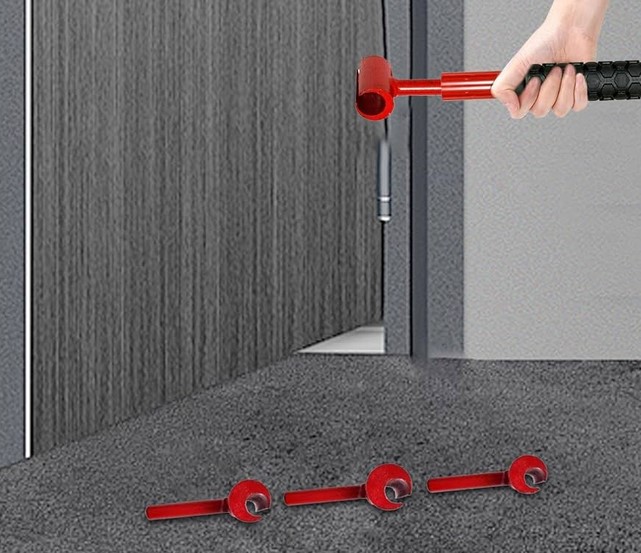
Nothing ruins the peaceful calm of a quiet morning like a sticking interior door that requires a solid shoulder-nudge to latch shut. Or worse, a sagging cabinet door that leaves an ugly 8-millimeter uneven gap along your newly renovated kitchen layout.
Most homeowners suffer through these daily annoyances or jump to extreme solutions like planing down the door edge or replacing the entire frame.
In my early days as a residential contractor, I made the exact same mistake. I once spent two full hours shimming, unscrewing, and physically wrestling a heavy solid-core entry door, only to end up with stripped screw holes and an even worse reveal.
It wasn’t until a veteran carpenter handed me a specialized hinge adjustment tool—essentially a high-leverage wrench designed to calibrate heavy-duty door hinges without removing them—that I realized how simple precision hardware tuning actually is.
Why Standard DIY Methods Usually Backfire
When a heavy door sags, the natural tendency for most DIYers is to grab a screwdriver and crank down on the top hinge screws. If that fails, they usually resort to wedging plastic shims behind the leaf or shaving off wood with a hand plane.
While shimming has its place in rough carpentry, using it on sagging heavy-traffic doors often creates secondary problems. Shimming changes the reveal line unevenly and can place abnormal lateral stress on the hinge knuckles, accelerating wear on the pin. Planing wood off the latch side, on the other hand, is a irreversible action; once you remove that timber, you can never put it back when seasonal humidity changes cause the frame to shift again.
+------------------------+---------------------------------+-----------------------------------+
| Adjustment Method      | Root Cause Addressed?           | Risk Level / Permanent Damage     |
+------------------------+---------------------------------+-----------------------------------+
| Tightening Screws      | Only if screws are loose        | High risk of stripping screw hole |
| Cardboard/Plastic Shim | Masks sagging temporarily       | Distorts hinge plane and pin fit  |
| Shaving Wood Edge      | No (Destructive workaround)     | High (Irreversible modification)  |
| Hinge Adjustment Tool  | Yes (Direct knuckle alignment)  | Zero (Preserves original frame)   |
+------------------------+---------------------------------+-----------------------------------+
Using a dedicated bender gives you surgical control over the mechanical geometry of the hinge assembly itself. You fix the true cause of the sag—bent metal knuckles under load—rather than treating the symptoms by destroying your woodwork.
The Mechanics Behind the Hinge Adjustment Tool
To understand why this tool works so effectively, you need to understand how heavy architectural door hinges behave over time under continuous force.
The Physics of Hinge Sag
A standard residential or commercial door acts like a cantilevered beam. Gravity constantly pulls the top corner of the door away from the jamb while pushing the bottom corner into the frame. Over thousands of open-close cycles, this leverage subtly widens the gap between the barrel knuckles of the top hinge leaf, causing the latch corner of the door to drop.
How Lever-Action Calibration Works
A specialty hinge adjustment tool consists of a heavy-gauge steel bar with a precision-milled slot designed to slip directly over the individual knuckles of a hinge leaf.
By applying controlled, micro-leveraged pressure, you bend the top hinge knuckles back toward the jamb by fractions of a millimeter. Think of it like tuning a piano string: small, calculated adjustments alter the tension and alignment of the entire door system without disturbing the surrounding structure.
Step-by-Step Guide: How to Micro-Adjust Sagging Doors
Re-aligning a sagging or sticking door with a long-handled adjustment wrench takes less than five minutes once you know the step-by-step procedure.
Step 1: Diagnose the Reveal Gaps
Close the door and inspect the gap between the door edge and the frame (known as the “reveal”).
-
If the gap at the top latch corner is tight or rubbing, your top hinge has stretched outward.
-
If the bottom edge scrapes against the threshold, the entire door assembly requires subtle upward leverage at the top leaf.
Step 2: Select the Correct Tool Size
Hinge knuckles come in standard industrial gauges. Measure your hinge thickness and pin diameter before purchasing or selecting your tool head.
-
Standard Residential: Fits smaller 3,5-inch to 4-inch hinges with lighter pin gauges.
-
Commercial Heavy-Duty: Designed for 4,5-inch to 5-inch heavy-gauge ball-bearing hinges found on solid wood or metal doors.
Step 3: Apply Controlled Pressure
Open the door to a 45-degree angle to relieve binding tension on the latch. Slide the slotted head of your hinge adjustment tool completely over the topmost knuckle of the top hinge leaf.
Smoothly pull the tool handle toward the door jamb in small, deliberate increments. Apply firm, gradual pressure—never yank or bounce on the lever.
Pro Tip: Always adjust one knuckle at a time, working your way down the top hinge leaf. Check the door clearance after every single movement. A shift of just 1 to 2 millimeters at the hinge barrel translates to nearly 5 to 10 millimeters of lift at the outer latch edge!
Step 4: Verify the Sweep and Latch Action
Close the door gently and observe the reveal lines along all four sides. The gap should be perfectly uniform (roughly 2,5 to 3 millimeters), and the latch bolt should slip smoothly into the strike plate without friction.
Essential Safety Protocols and Advanced Field Tips
Working with heavy leverage tools requires care to prevent damaging hardware or hurting your hands.
-
Support the Door Weight: For solid-core or metal commercial doors, place a wooden wedge or air-bag shim beneath the bottom outer corner while making adjustments. This prevents sudden shock-loads on the middle hinge leaf.
-
Inspect the Fasteners First: Before bending any metal knuckles, ensure the hinge leaf screws driven into the wooden jamb are tight and secure. Bending a hinge while screw threads are loose will strip the screw holes out completely.
-
Watch Out for Cast Iron Hardware: Only use adjustment tools on forged steel, brass, or heavy-duty architectural hinges. Decorative budget hinges made of cast zinc or low-grade die-cast metal can snap under heavy lateral torque.
Never use a standard adjustable pipe wrench or pliers as a substitute for a genuine slotted hinge bender. Pliers lack the broad surface contact area needed to spread leverage evenly, meaning you will crush or distort the round profile of the hinge barrel, seizing the hinge pin inside permanently.
Final Thoughts: Master the Art of Precision Hardware
Home improvement isn’t always about massive teardowns and loud power tools. More often than not, true craftsmanship comes down to mastering subtle hardware adjustments that keep your living spaces operating silently and effortlessly.
Equipping your toolkit with a dedicated hinge adjustment tool takes the guesswork out of door maintenance, saving you hours of frustrating labor and protecting your timber frames from unnecessary damage.
Have you ever struggled with a sticking door or uneven cabinet reveal in your house? What tricks have you tried in the past to get things closing smoothly again? Share your experiences, questions, or favorite hardware tips in the comments below!