The bedroom is often considered a personal sanctuary, a space where you relax, sleep, and unwind after a long day. One of the most important features of the bedroom is the bed, and more specifically, the headboard. A well-designed headboard can make a huge difference in the overall aesthetics and functionality of the room. Custom headboard designs offer a unique opportunity to personalize your bedroom and reflect your individual style. In this article, we’ll explore the benefits of custom headboards, different design options, and how you can create a headboard that perfectly fits your needs and tastes.
Why Opt for Custom Headboard Designs?
A headboard is not just a functional piece; it is an integral part of the bedroom’s overall design. It provides support when sitting up in bed, adds visual appeal, and creates a sense of balance and symmetry. While store-bought headboards can be beautiful, they often lack the personal touch that many homeowners crave. With custom headboard designs, you have the freedom to select materials, shapes, and colors that suit your personality and bedroom decor.
Here are some reasons why you should consider a custom headboard for your bedroom:
1. Personalization and Uniqueness
A custom headboard is a blank canvas that allows you to bring your vision to life. Unlike pre-made options, which often feature generic designs, custom headboards can be tailored to your exact preferences. Whether you want a traditional tufted design or a modern minimalist style, a custom headboard lets you infuse your personality into your bedroom’s aesthetic. You can choose everything from the type of fabric or wood to the exact shape and size, ensuring that the headboard complements your existing decor perfectly.
2. Perfect Fit
Every bed is unique, and the dimensions of your room may vary. A custom headboard is made to fit your specific bed frame and space. If your bed is an unusual size or your room has an unconventional layout, custom headboards provide a solution that perfectly matches your needs. Whether you have a king-sized bed in a smaller room or a queen-sized bed in a large, open space, a custom headboard will fit seamlessly, ensuring the proportions are just right.
3. Quality and Durability
When you opt for a custom headboard, you often get a higher level of craftsmanship and materials. Many pre-made headboards are mass-produced, which can sometimes result in lower-quality construction or materials. With a custom design, you can choose premium materials such as hardwood, high-quality fabrics, or even leather, ensuring the longevity of the piece. Custom headboards are built to last and can become a timeless feature in your bedroom.
4. Versatility in Design
Custom headboards offer endless design possibilities. From sleek, contemporary designs to intricate, vintage-inspired styles, you can create a headboard that aligns with your bedroom’s theme. Whether you want a statement piece that grabs attention or a subtle design that blends with your decor, the versatility of a custom design gives you total control over the final outcome.
Types of Custom Headboard Designs
Custom headboards can be made from a variety of materials and come in numerous styles, each offering a distinct look and feel. Below are some popular custom headboard options to consider:
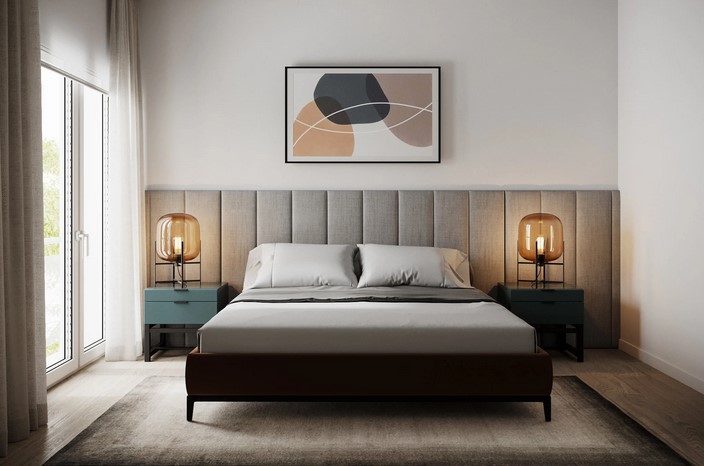
1. Upholstered Headboards
Upholstered headboards are one of the most popular choices for custom designs. They can be covered in a variety of fabrics such as linen, velvet, cotton, or leather, allowing you to choose the texture and color that best suits your bedroom decor. Upholstered headboards provide a soft, comfortable surface to lean against while reading or watching TV in bed.
Custom upholstered headboards can be tufted for added texture and visual interest or left smooth for a more contemporary look. If you want a luxurious feel, consider fabrics like velvet or suede. Alternatively, a crisp linen or cotton fabric can provide a more casual, laid-back vibe. The benefit of upholstered headboards is that they can be easily customized to your preferred shape, size, and design features, giving you the ultimate flexibility.
2. Wooden Headboards
For those who prefer a more natural, rustic, or traditional look, a custom wooden headboard is a great option. Wood is a durable and timeless material that works well in various bedroom styles, from farmhouse and cottage-inspired rooms to more contemporary spaces. Custom wooden headboards can be crafted from a variety of hardwoods, including oak, walnut, maple, or reclaimed wood, allowing you to choose the finish, texture, and wood type that best suits your taste.
Wooden headboards can be designed with intricate carvings for a vintage feel or with clean lines for a more modern look. You can also choose to have them stained or painted to match the color palette of your bedroom. Wood’s versatility makes it a popular choice for those looking for something that can complement both traditional and contemporary bedroom styles.
3. Metal Headboards
For a sleek and industrial look, consider a custom metal headboard. Metal headboards can add a touch of sophistication to a bedroom and are available in various finishes, such as brushed steel, wrought iron, or brass. Custom metal headboards are often chosen for their durability and their ability to create a striking contrast against softer materials like upholstered bedding or wooden furniture.
A custom metal headboard can be designed with simple lines for a minimalistic approach, or it can feature more elaborate details such as scrollwork or geometric patterns. Metal offers a modern yet timeless design, and it works well in both contemporary and vintage-inspired rooms.
4. Panel or Slat Headboards
If you want a design that’s both modern and minimalist, a panel or slat headboard could be the perfect option. These headboards are made from wood or other materials, with vertical or horizontal slats that add texture and dimension to the design. Panel or slat headboards can be customized in a variety of finishes, from natural wood tones to painted or stained finishes.
Custom slat headboards allow for a lot of flexibility in design. You can adjust the spacing between slats or opt for a full panel design. This style is particularly popular in mid-century modern and contemporary bedrooms, as it provides a clean and streamlined look.
5. Floating Headboards
For a more cutting-edge and minimalist design, consider a floating headboard. Floating headboards are mounted directly onto the wall, creating the illusion that the headboard is “floating” above the bed. This design is sleek, modern, and can make a small room appear more spacious. Floating headboards are often made from wood or metal and can be customized with lighting features to add a subtle ambiance to the room.
This design works well in contemporary spaces and can create a modern, airy feel. The floating headboard is perfect for those who prefer a less traditional design but still want a headboard that makes a statement.
Tips for Designing Your Custom Headboard
When designing a custom headboard, there are several factors to consider to ensure it complements your bedroom and meets your functional needs.
1. Measure Your Bed and Room Carefully
Before starting your custom headboard project, make sure to measure your bed frame and the available wall space. A well-sized headboard will add balance and dimension to your room, while an oversized or undersized headboard can make the space feel off-balance.
2. Consider the Overall Style of Your Bedroom
Think about the existing decor in your bedroom. If your room has a modern aesthetic, a sleek, minimalist design will complement the space. If your bedroom is more traditional or rustic, a custom wood or upholstered headboard may work better.
3. Choose Quality Materials
The material you choose for your headboard will play a big role in its longevity and overall look. Choose high-quality materials that suit your lifestyle, whether it’s durable wood, luxurious velvet, or sturdy metal.
4. Customization Options
Make sure to explore all the customization options available to you, from the color and texture of fabrics to the shape and size of the headboard. A custom headboard offers endless possibilities, so make sure to select a design that fits your vision.
Custom headboard designs offer a fantastic way to personalize your bedroom and create a space that truly reflects your style. Whether you choose an upholstered design for comfort, a wooden headboard for timeless appeal, or a modern metal piece for a sleek look, the options are endless. By considering your bedroom’s existing decor, your personal preferences, and functional needs, you can design a custom headboard that not only enhances the look of your space but also elevates your overall sleep experience. Ultimately, a custom headboard will serve as the centerpiece of your bedroom, providing both beauty and comfort in equal measure.