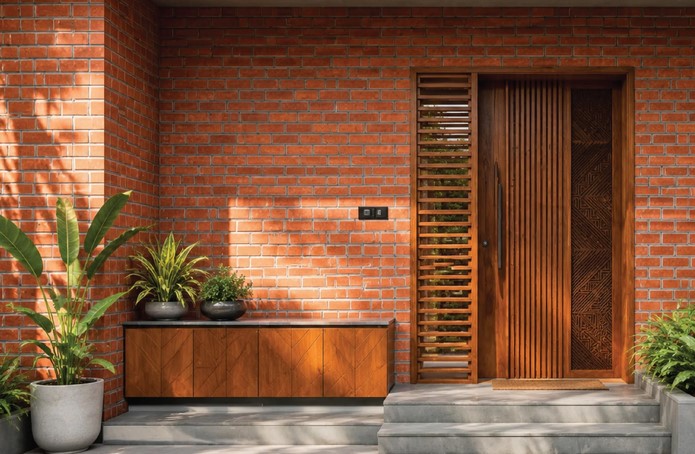
You step into a beautifully lit room, and your eyes are immediately drawn to a feature wall that exudes warmth, history, and character. Then you look at your own living room—a flat, uninspired drywall box that feels sterile despite expensive furniture and fresh coats of paint. The missing ingredient is rarely another piece of decor; it is architectural texture and shadow depth.
Over my 10+ years managing interior renovations and architectural face-lifts, I have seen homeowners spend thousands on paint refreshes that fail to solve the core design problem: flat surfaces reflect light uniformly, making spaces feel smaller and devoid of character. Building a genuine, full-depth structural brick wall indoors is rarely viable due to massive floor load constraints and lost interior square footage. However, using high-density brick wall tiles offers an elegant engineering solution that achieves authentic tactile depth without structural compromises.
In this deep-dive guide, we will unpack how to select, layout, and install brick wall veneers like a seasoned professional to transform flat walls into dynamic architectural statements.
The Physics of Texture: Why Flat Walls Feel Cold
To understand why thin brick veneers work so well in modern interiors, we must look at how light interacts with indoor surfaces. Smooth drywall produces specularity—uniform light reflection with zero shadow play.
The Theater Stage Analogy
Think of a flat interior wall as a blank theater stage illuminated by overhead spotlights. Without set pieces, props, or backdrop layers, the stage looks empty regardless of how brightly lit it is.
Integrating brick wall tiles introduces thousands of micro-recesses, varying bevels, and textured mortar joints across your wall plane. These varied surfaces catch ambient light, casting subtle micro-shadows that change throughout the day as natural sunlight shifts across the room.
[ Ambient Overhead Light ]
           |
           v
[ Smooth Drywall Surface ]  ---> Uniform Reflection (Flat, Sterile Appearance)

           VS.

[ Brick Wall Tiles & Mortar ] ---> Light Scattering + Micro-Shadows (Dynamic Visual Depth)
Expert Insight: In my field installations, clients often worry that brick textures will make a room feel smaller. In reality, the micro-shadows and horizontal line patterns created by running-bond tile layouts visually stretch room width, creating a perception of increased spatial depth.
Material Engineering: Clay, Porcelain, and Cementitious Options
Not all thin brick products are manufactured from the same raw materials. Selecting the right composition depends on your space’s humidity, weight limits, and exposure to heat.
+-----------------------------------------------------------------------+
|                    BRICK VENEER MATERIAL MATRIX                       |
+-----------------------------------------------------------------------+
| REAL KILN-FIRED CLAY (Real Thin Brick)                                |
|  * Composition: Genuine sliced natural clay                           |
|  * Aesthetic: Unmatched authentic texture, rich variation             |
|  * Best For: Accent walls, fireplaces, dry living areas               |
+-----------------------------------------------------------------------+
| PORCELAIN & CERAMIC BRICK TILES                                       |
|  * Composition: Molded high-density porcelain clay                    |
|  * Aesthetic: Uniform dimensions, printed/molded surface              |
|  * Best For: High-moisture areas (showers, kitchen backsplashes)      |
+-----------------------------------------------------------------------+
| CEMENTITIOUS RECONSTITUTED STONE                                      |
|  * Composition: Lightweight mineral aggregate & Portland cement       |
|  * Aesthetic: Deep rustic relief, weathered antique finish            |
|  * Best For: Large architectural feature walls, entryways             |
+-----------------------------------------------------------------------+
1. Genuine Sliced Clay Brick Veneers
These are created by slicing the outer faces off full-size kiln-fired clay bricks into 1/2-inch to 3/4-inch thin profiles. They deliver authentic rough-hewn texture and natural color variations.
2. Glazed & Porcelain Brick Tiles
Engineered for wet environments, porcelain brick tiles possess an ultra-low water absorption rate (below 0.5%). They offer easy cleaning in kitchen backsplashes and bathroom walls where grease or soap scum accumulates.
Subfloor & Substrate Preparation: Building a Permanent Bond
Applying heavy brick wall tiles directly onto standard painted drywall without proper surface prep is the leading cause of tile adhesion failure.
Critical Substrate Rules
-
Evaluate Wall Shear Weight: Thin clay bricks weigh between 5 to 7 lbs per square foot. Ensure your wall framing studs are anchored securely on 16-inch centers.
-
Scuff and Prime Paint: Thin-set mortar cannot bond securely to glossy or latex paint. Scuff the wall thoroughly with 60-grit sandpaper, or install a 1/4-inch cement backer board directly over the studs for maximum load capacity.
-
Use Modified Thin-Set Mortar: Always select a polymer-modified thin-set mortar rated ANSI A118.4 or ANSI A118.15. These additives provide essential flexibility and vertical sag resistance so tiles do not slide down the wall during installation.
Step-by-Step Installation: Achieving a Master Mason Finish
Laying brick veneers requires precise layout control to maintain consistent grout lines and avoid awkward fractional cuts at ceiling joints.
[ Step 1: Substrate Priming / Cement Board ]
                    |
                    v
[ Step 2: Establish Level Reference Line ]
                    |
                    v
[ Step 3: Apply Polymer-Modified Thin-Set Mortar ]
                    |
                    v
[ Step 4: Set Tiles with Corner Units First ]
                    |
                    v
[ Step 5: Grout Joint Pointing with Mortar Bag ]
Step 1: Establish a Benchmark Line
Never start setting tiles off a crooked floor. Measure up from the floor to one tile height plus a 3/8-inch grout joint, and draw a perfectly level reference chalk line across the wall using a laser level.
Step 2: Install L-Shaped Corner Bricks First
If your feature wall wraps around an outside corner, always set your two-piece L-shaped corner tiles first. Alternate long and short legs on consecutive courses to simulate full structural brick construction.
Step 3: Butter the Backs (Back-Butter Technique)
In addition to combing mortar onto the wall with a 3/8-inch notched trowel, back-butter the reverse side of each brick wall tile with a thin flat coat of mortar to guarantee 95%+ surface coverage.
Step 4: Joint Pointing and Striking
Once the thin-set sets for 24 hours, fill a mason’s grout bag with sanded tile grout or traditional Type N masonry mortar. Squeeze the mortar into the joints, allow it to become thumb-print firm, and shape the joints with a wooden tuck pointer or concave jointer tool.
Comparative Analysis: Surface Texturing Solutions
| Feature / Metric | Genuine Brick Wall Tiles | Textured Wallpaper | 3D PVC Wall Panels |
| Tactile Depth | High (1/2″ to 3/4″ real relief) | Low (Flat paper print) | Medium (Hollow plastic shell) |
| Heat Resistance | Fireproof (Fireplace safe) | Highly Flammable | Low Heat Tolerance |
| Lifespan | 50+ Years | 3 to 7 Years | 5 to 10 Years |
| Impact Durability | Exceptional (Hardened clay) | Poor (Tears easily) | Low (Prone to denting) |
Expert Advice: Pro Tips & Hidden Pitfalls
💡 Pro Tip: The “Dry Stack” vs. “Mortar Joint” Design Decision
Want a contemporary industrial look? Install your brick wall tiles tightly against one another without mortar joints (known as a dry-stack installation). Prefer a timeless European villa look? Space the tiles 3/8 to 1/2 inch apart and use a heavy over-grout technique (German Smear) where mortar is brushed lightly over the face of the bricks.
⚠️ Hidden Warning: Beware of Efflorescence Traps
When installing natural clay thin bricks in basements or lower-level walls with higher ambient humidity, soluble salts inside the clay can migrate to the surface, creating a white powdery film called efflorescence. Always seal natural clay tiles with a breathable, penetrating silane-siloxane masonry sealer after the grout has fully cured.
Long-Term Maintenance & Protection
Keeping your brick accent wall looking pristine demands minimal effort once properly sealed:
-
Routine Dusting: Vacuum the wall quarterly using a soft brush attachment to remove dust trapped on horizontal brick ledges.
-
Spot Cleaning: Clean kitchen backsplashes using warm water and a neutral pH stone cleaner; avoid acidic tile cleaners that degrade mortar joints.
-
Re-Sealing Schedule: Reapply a penetrating sealer every 3 to 5 years in wet areas to maintain water stain resistance without altering the natural matte appearance.
Redefine Your Interior Architecture
Transforming a plain, flat room into an architecturally engaging space does not require major structural construction. By thoughtfully integrating real brick wall tiles, choosing the right mortar technique, and properly preparing your substrate, you can infuse your home with warmth, character, and enduring visual depth that lasts a lifetime.
Are you planning an accent wall renovation or looking to update an existing fireplace surround? What style of brick texture suits your interior best? Share your room dimensions, design ideas, or technical questions in the comments below—I would love to help you plan your wall transformation!