Mechanical Friction Mitigation: Ensuring Longevity with Door Hinge Lube

Source:https://media.wd40.in

It usually starts in the middle of the night. You creep out of bed to grab a glass of water, step quietly down the hallway, push open the bathroom door, and—SCREECH. A high-pitched metal-on-metal squeal echoes through the silent house, waking up the kids, the dog, and your spouse.

I can’t tell you how many times a client has called me out to inspect a “sagging” or “broken” heavy solid-core entry door, only for me to point out a fine pile of metallic black dust scattered across the floorboard directly underneath the hinge knuckles.

That black powder isn’t dirt. It’s micro-shavings of raw steel—your door hinges literally grinding themselves to death because someone neglected a two-minute maintenance task.

Over my 10+ years as a residential contractor, I’ve learned that quiet homes aren’t built by accident; they are maintained by design. Selecting and applying the right door hinge lube is the single easiest way to stop mechanical friction, prevent premature hardware destruction, and keep your doors gliding effortlessly.

The Physics of Hinge Friction: Why Screeches Happen

To understand why hinges fail, you have to look closely at how a hinge knuckle operates under load.

Think of a door hinge like a series of small, interlocked metal vertebrae wrapped around a central steel pin. Every time you open a 70-pound solid wood door, that weight creates severe lateral torque and downward shear stress on those tiny contact points.

Without a protective fluid barrier, raw metal grinds directly against raw metal. This creates extreme micro-friction, which generates heat, shears off tiny iron particles, and creates that maddening squeaking noise.

Applying a high-grade door hinge lube places an invisible, microscopic film between those metal surfaces. Instead of metal grinding against metal, the surfaces slide smoothly over a cushion of synthetic fluid or solid lubricant particles.

+--------------------------+-----------------------+-----------------------+-------------------------+
| Lubricant Type           | Viscosity / Film      | Dust Attraction Risk  | Long-Term Effectiveness |
+--------------------------+-----------------------+-----------------------+-------------------------+
| Standard WD-40 (Solvent) | Thin / Non-Durable    | Low (Evaporates Fast) | Extremely Poor (Weeks)  |
| Silicone Spray           | Medium Dry Film       | Low                   | Moderate (3 - 6 Months) |
| White Lithium Grease     | Heavy Wet Paste       | High (Traps Dirt)     | Exceptional (1+ Years)  |
| PTFE / Teflon Dry Lube   | Ultra-Thin Dry Film   | Minimal               | High (6 - 12 Months)    |
| Graphite Powder          | Micro-Fine Solid      | Zero                  | High (Messy to Apply)   |
+--------------------------+-----------------------+-----------------------+-------------------------+

Chemical Formulations: Matching Lube to the Application

The biggest mistake DIYers make is reaching for whatever aerosol can happens to be sitting on their garage shelf. Using the wrong formula can actually cause more damage over time.

The WD-40 Trap (Solvent vs. Lubricant)

Standard multi-use WD-40 is primarily a solvent and water displacer, not a long-term lubricant. While spraying it onto a squeaky hinge gives immediate gratification, the light solvent dissolves whatever grease was left inside the knuckle and quickly evaporates. Within three weeks, your hinge is drier and noisier than before.

White Lithium Grease (For Heavy Exterior Doors)

White lithium grease is a thick, petroleum-based lubricant that clings to metal under extreme pressure and resists water wash-off. It is the gold standard for heavy exterior front doors, storm doors, and garage access entry points.

PTFE / Teflon & Silicone Dry Sprays (For Interior Doors)

For interior residential doors, dry lubricants containing PTFE (polytetrafluoroethylene) or silicone are clear winners. They go on wet to penetrate deep inside the hinge knuckles, then dry into a clear, non-sticky film that won’t attract household dust, pet hair, or carpet fibers.

Step-by-Step Protocol: How to Properly Lubricate a Hinge

Spraying lube blindly at the outside of a closed hinge accomplishes very little—the fluid just runs down your paintwork without reaching the internal pin. Here is the proper field method to get fluid deep inside the knuckles.

1.Prop the Door Open securely:Secure the door leaf.

Open the door to a 90-degree angle and slip a wooden shim or doorstop underneath the outer edge. This supports the door’s weight so the hinge pin doesn’t bind when you lift it.

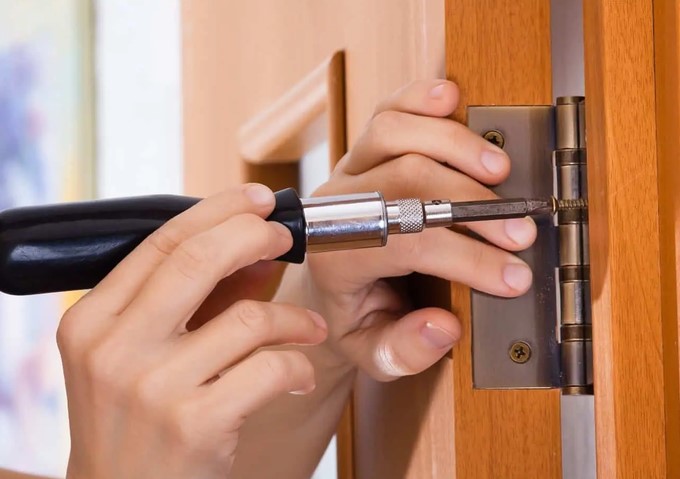
2.Drive Out the Hinge Pin:Expose the friction surfaces.

Place a flathead screwdriver or pin punch against the bottom tip of the hinge pin. Lightly tap upward with a hammer until the head of the pin pops free, then pull the pin out by hand.

3.Clean the Pin and Knuckles Thoroughly:Remove old grit and rust.

Wipe down the hinge pin with a rag soaked in mineral spirits or degreaser to remove old oxidized black gunk. Use a small wire pipe-cleaner brush to scrub out the interior barrel knuckles.

4.Apply Lube and Reinsert the Pin:Re-fit and seal.

Coat the pin with your chosen door hinge lube (a small dab of lithium grease or a thorough coat of PTFE spray). Slide the pin back down through the knuckles, tap it home with a rubber mallet, and wipe off any excess squeeze-out instantly.


Expert Advice: Pro Tips and Hidden Traps

⚠️ Beware of Gravity Squeeze-Out

Over-saturating a hinge with liquid oil causes fluid to slowly drip down the door frame over the following 48 hours. On painted trim, oil leaves permanent dark stains; on carpet or hardwood floors, it creates slippery spots and dust traps. Always keep a microfiber rag handy to wipe away excess lubricant immediately after cycling the door.

Dealing with Stubborn Pin Corrosion

If a hinge pin refuses to budge when you tap it with a hammer, do not force it—you risk bending the metal hinge leaves out of alignment.

  • Apply a dedicated penetrating oil (like PB Blaster or Liquid Wrench) directly to the top seam of the pin cap.

  • Let it dwell for 10 minutes to break down rust bonds before tapping again.

💡 Pro Tip from the Field

If you have high-traffic, heavy solid-core doors, consider replacing standard residential plain-bearing hinges with ball-bearing hinges. Ball-bearing units feature permanently sealed lubricated raceways that eliminate metal-on-metal friction entirely, giving you dead-silent operation for decades with minimal maintenance.

Keep Your Hardware Glide-Smooth for Life

Maintaining your doors doesn’t require expensive tools or hours of hard labor. Taking ten minutes once a year to inspect your hardware and apply a targeted door hinge lube prevents unsightly black metal dust, protects finish coatings, and ensures every door in your home operates smoothly and silently.

How many squeaky doors are currently hiding in your home? Have you ever pulled a hinge pin out to clean off that mysterious black sludge? Leave a comment below with your questions or share your go-to home maintenance tips!

Industrial Irrigation Logistics: Optimizing Storage with the Garden Hose Reel

Source:https://anacondapipeandhose.com

A few summers ago, I was managing a large-scale residential estate renovation that featured an expansive 2-acre lawn, formal gardens, and a custom greenhouse complex. Everything on the job site was running like clockwork until I noticed a recurring, frustrating pattern: every afternoon, two of our crew members lost nearly twenty minutes untangling a massive, kinked 150-foot rubber hose left in a heap near the main water spigot.

Even worse, someone drove a loaded utility cart over the brass coupling one afternoon, crushing it flat and flooding the surrounding flowerbed.

That single crushed fitting caused a two-hour delay, wasted hundreds of gallons of water, and cost a small fortune in emergency plumbing repairs. The fix wasn’t complicated or expensive—we installed a heavy-duty wall-mounted garden hose reel with an internal brass swivel joint. Instantly, hose deployment took thirty seconds, storage took twenty, and our jobsite water logistics became seamless.

Over my 10+ years in residential construction and landscape management, I’ve learned that water logistics can make or break an outdoor space. A high-quality garden hose reel isn’t just a basic plastic accessory—it is an essential asset management tool that extends hose lifespans, reduces safety hazards, and transforms how you care for your property.

The Hidden Cost of Improper Hose Storage

Leaving a heavy hose lying on the turf or coiled loosely on a rusty wall hook does far more damage than just creating an eyesore. It actively destroys your watering equipment from the inside out.

Think of a garden hose like the circulatory system of your yard. When left exposed under the baking sun, internal water pressure spikes as trapped moisture heats up. Combine UV degradation with micro-kinks and crushed inner linings, and your expensive heavy-duty hose develops weak spots that burst under normal tap pressure.

A dedicated garden hose reel acts like a protective vault. It maintains a consistent bend radius, shields rubber and vinyl compounds from direct sun damage, and keeps fittings off the muddy ground where dirt and debris can ruin internal rubber O-rings.

+--------------------------+-----------------------+-----------------------+-------------------------+
| Storage Method           | Hose Lifespan Impact  | Kink Prevention       | UV Protection           |
+--------------------------+-----------------------+-----------------------+-------------------------+
| Ground Pile              | Low (1 - 2 Years)     | Extremely Poor        | None                    |
| Basic Wall Hook          | Moderate (2 - 3 Yrs)  | Poor (Hanging Kinks)  | Minimal                 |
| Manual Garden Hose Reel  | High (5 - 8 Years)    | Excellent             | High (Depending on Case)|
| Auto-Retractable Reel    | Exceptional (8+ Yrs)  | Maximum               | Total Enclosure         |
+--------------------------+-----------------------+-----------------------+-------------------------+

Anatomy of a Pro-Grade Garden Hose Reel

When shopping for a garden hose reel, it’s easy to get lured in by cheap $30 plastic models at big-box stores. Take it from someone who has broken dozens of them over the years: cheap plastic reels are a waste of money.

To choose a unit that will withstand years of heavy use, look for these specific engineering features:

1. Solid Brass or Stainless Steel Swivels

The swivel joint is the heart of any hose reel—it is where the stationary inlet pipe meets the rotating drum. Cheap reels use plastic snap-in swivels that crack under winter freezes or leak after a few dozen turns. Always insist on solid brass or stainless steel swivels with double O-ring seals.

2. Heavy-Gauge Steel or UV-Stabilized Poly Resin

For open wall mounts or mobile cart units, powder-coated tubular steel offers maximum structural rigidity. If you prefer a hidden box enclosure, choose high-density, UV-stabilized polypropylene that won’t turn brittle under sun exposure.

3. Self-Layering Guide Mechanisms

Uneven coiling creates overlapping loops that bind up the drum. Advanced reels feature a track-guided auto-rewind or manual level-wind arm that distributes the hose evenly across the drum automatically as you crank.

Matching Reel Designs to Your Landscape Layout

Not every yard requires the same storage setup. Choosing the right design depends on your property size, wall structures, and watering frequency.

  • Wall-Mounted Reels: Best for patios, tight side-yards, and garage exteriors. Mounting directly to brick, concrete, or wall studs keeps floor space clear and provides an ergonomic cranking height.

  • Cart-Style Mobile Reels: Ideal for larger acreage, farms, or commercial sites where a single 200-foot hose needs to be transported between multiple distant spigots.

  • Auto-Retractable Enclosed Reels: The ultimate luxury option for residential gardens. A internal spring-loaded mechanism pulls the hose back into a protective housing with a gentle tug—eliminating manual cranking entirely.

Step-by-Step Installation Protocol for Wall-Mounted Units

A fully loaded 100-foot rubber hose filled with water can weigh upwards of 40 to 50 pounds. Mounting a reel improperly will pull the anchor screws right out of your siding, causing expensive wall damage.

1.Find Wall Studs or Solid Masonry:Locate structural support.

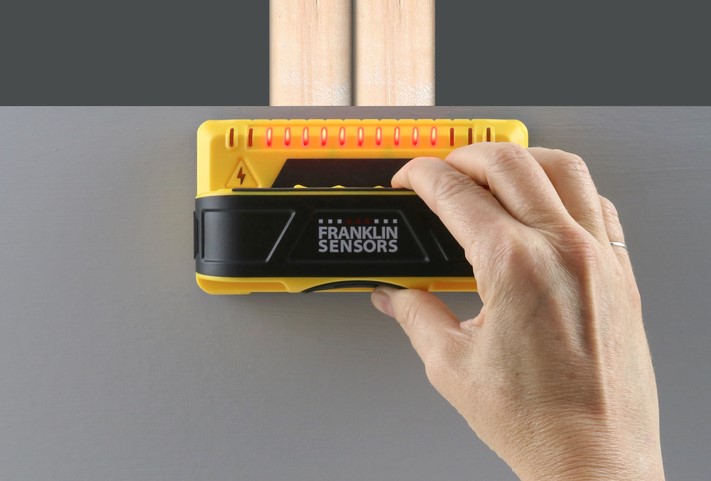
Never anchor a hose reel into hollow vinyl siding, stucco, or drywall alone. Use a stud finder to locate solid wood framing studs, or prepare to anchor directly into concrete or brick masonry.

2.Mark and Pre-Drill Pilot Holes:Level and mark anchor points.

Hold the mounting bracket level against the wall. Mark your hole locations and pre-drill pilot holes using a wood bit for studs or a masonry carbide bit for brick.

3.Drive Lag Bolts with Washers:Heavy-duty fasteners required.

Secure the mounting bracket using 3/8-inch by 3-inch stainless steel or galvanized lag bolts paired with flat washers to distribute the pull weight.

4.Attach Leader Hose and Test Swivel:Connect and flush.

Attach the flexible leader hose from the spigot to the reel’s internal swivel inlet. Turn on the water and flush the system to check for leaks before winding your main hose.


Expert Advice: Pro Tips and Winterization Hazards

⚠️ The Winter Freeze Trap

The single fastest way to destroy a high-end garden hose reel is leaving water trapped inside the brass swivel over winter. When trapped water freezes, it expands with immense force, cracking internal brass housings and tearing rubber seals. Always disconnect the leader hose, drain the drum, and store portable units indoors before the first hard freeze!

Eliminating Water Pressure Loss

Have you ever noticed a dramatic drop in water pressure after installing a hose reel? That friction loss usually occurs at the leader hose connection.

  • Use a short, 5/8-inch or 3/4-inch inner diameter leader hose rather than a narrow 1/2-inch hose.

  • Keep the leader hose as short as possible (under 6 feet) to maintain maximum gallon-per-minute (GPM) flow rate to your spray nozzles or sprinklers.

💡 Pro Tip from the Field

Before winding a brand-new hose onto your reel for the first time, uncoil the hose completely in a straight line across a sunlit lawn for an hour. The warmth relaxes the factory memory curls in the rubber, allowing it to wind onto the reel drum flat and smooth without twisting.

Streamline Your Outdoor Maintenance Today

Investing in a pro-grade garden hose reel does far more than just keep your yard looking neat and tidy. It protects your equipment investment, eliminates dangerous tripping hazards, and turns a tedious daily chore into a smooth, effortless routine.

How do you currently store your hoses and watering gear? Have you ever dealt with frozen swivels or frustrating hose kinks on your property? Leave a comment below with your setup questions or share your favorite yard maintenance hacks—I’d love to jump in and offer custom advice!