You are standing over a simmering pot of homemade marinara sauce, the kind that takes six hours to perfect. You reach for your trusty old spatula to give it a stir, only to realize that the tip has started to “fuzz” and melt into the sauce. Or worse, you go to scrape a mixing bowl and the head of the tool snaps off, leaving a plastic shard buried in your cake batter.
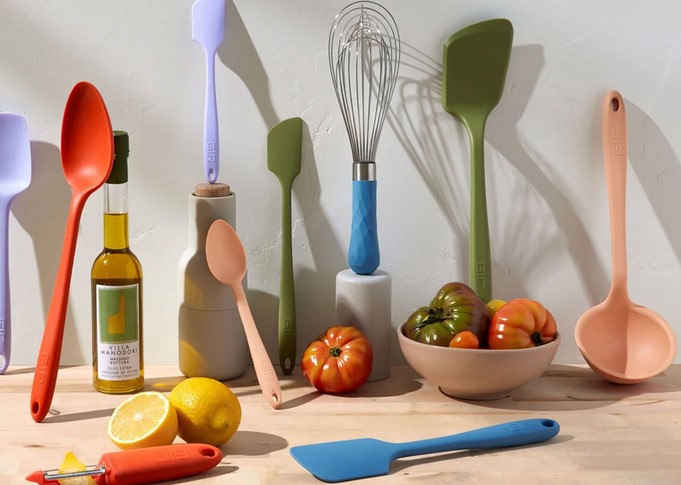
In my decade of managing home improvement projects—which, believe it or not, often starts and ends in the high-traffic environment of a kitchen—I’ve seen more “bargain” tools fail than I care to count. We focus so much on the heavy machinery like ovens and dishwashers that we overlook the humble Silicone Spatula Set. But make no mistake: this is the “hand tool” of the culinary world, and if the engineering is off, your cooking suffers.
The Chemistry of Quality: Why Silicon Isn’t Just Plastic
One of the most common mistakes I see beginners make is confusing silicone with rubber or cheap plastic. From a technical standpoint, silicone is a “hybrid” polymer. It contains silicon (derived from sand), oxygen, carbon, and hydrogen.
Think of it like a high-performance tire for your kitchen. A cheap plastic spatula is like a wooden wheel—it’s rigid, it breaks under heat, and it has no “give.” A premium Silicone Spatula Set is like a modern radial tire; it’s designed to flex, withstand extreme friction (heat), and return to its original shape every single time.
In my own kitchen, I’ve put professional-grade silicone through “torture tests” that would liquefy standard nylon tools. We’re talking direct contact with a 500°F cast-iron skillet. The result? Not a single singe mark.
Engineering Standards: What Makes a Professional Set?
When I’m auditing a kitchen for a client, I look for three specific engineering markers in their Silicone Spatula Set. If it doesn’t meet these, it’s going in the trash.
1. The Internal Core (The Skeleton)
The biggest weakness in cheap spatulas is the “floppy neck.” A professional tool needs an internal skeleton, usually made of stainless steel or high-grade fiberglass.
This core provides the Tensile Strength needed to fold heavy bread dough or scrape thick peanut butter. Without a solid core, you’re essentially trying to move a mountain with a wet noodle.
2. Seamless Unibody Construction
This is my “Expert Insight” for the day: Avoid two-piece spatulas. You know the ones where the head pulls off the handle?
Those joints are a breeding ground for bacteria and mold. Food particles get trapped in the socket where you can’t see them. A unibody Silicone Spatula Set—where the silicone completely encases the handle—is functionally “sanitary by design.” It’s much easier to clean and impossible for the head to “fly off” during a vigorous mix.
3. Shore Hardness and Flex
In engineering, we use the “Shore Durometer” scale to measure how hard a material is. A perfect spatula set should have a “dual-zone” feel. The edge should be thin and soft (lower Shore rating) to act like a squeegee against the bowl, while the body should be firm (higher Shore rating) to support the weight of the food.
Technical LSI Vocabulary: The Spec Sheet
If you’re looking to upgrade, keep these technical terms in your back pocket to ensure you’re getting “Pro” level gear:
-
BPA-Free Food Grade Silicone: Non-negotiable for safety and non-toxicity.
-
Heat Resistance Rating: Look for a minimum of 480°F (250°C).
-
Non-Porous Surface: This ensures the tool won’t absorb smells (nobody wants their chocolate frosting to taste like yesterday’s garlic sauté).
-
High-Tear Strength: The ability of the silicone to resist nicking or cutting when it hits a sharp blade, like in a blender.
Why Durability Matters for the Intermediate Cook
For the intermediate home cook, your tools are an extension of your hands. If you’re constantly compensating for a tool that is too flimsy or too stiff, your technique will never improve.
I’ve observed that when a cook switches to a high-quality Silicone Spatula Set, their “yield” increases. You’re no longer leaving 10% of your expensive ingredients stuck to the side of the bowl. Over a year of baking, a professional spatula literally pays for itself in saved ingredients.
The “Squeegee” Effect
Think of the edge of a high-end silicone tool like a windshield wiper. It should conform to the curve of any vessel—be it a square Tupperware or a round KitchenAid bowl—and leave the surface bone-dry. If your spatula leaves streaks of batter behind, the edge geometry is failed.
Maintenance and Longevity: The Pro’s Secret
Even the best Silicone Spatula Set can be ruined by poor maintenance. While most are “dishwasher safe,” I always recommend hand-washing your primary tools.
The harsh detergents and high-heat drying cycles in a dishwasher can, over hundreds of cycles, cause the silicone to “bloom” (that white, powdery residue). This is actually the breakdown of the polymer’s surface. To keep your tools in “showroom condition,” a quick scrub with mild soap and warm water is all they need.
Tips Pro: If your silicone tools start to smell like onions or spices, don’t throw them away. Soak them in a mixture of baking soda and lemon juice for 30 minutes. The alkaline nature of the soda pulls the trapped odors out of the microscopic pores of the silicone.
Never leave your silicone spatula resting on the edge of a pot while the gas flame is high. While the silicone can handle the heat, the handle’s internal core (if it’s plastic-based) can warp, or the rising heat from the side of the pot can exceed the 600°F “flash point,” causing permanent damage.
The Financial Logic of Quality
From a home improvement perspective, I always look at the “Cost Per Use.”
-
A $5 grocery store spatula lasts 6 months before the head snaps or it melts. Cost: $10/year.
-
A $30 professional Silicone Spatula Set lasts 10 years or more. Cost: $3/year.
The math is simple. Investing in durability isn’t just about better cooking; it’s about better home economics.
Closing the Kitchen Audit
In the end, your kitchen is only as efficient as its weakest link. Upgrading to a professional-grade Silicone Spatula Set might seem like a small change, but it’s one that you will feel every single time you cook. It’s the difference between fighting your tools and having them work in perfect harmony with your movements.
Have you ever had a “kitchen fail” where a tool literally fell apart in your hands? Or do you have a favorite spatula that has been with you through a decade of dinners? I’d love to hear your stories in the comments—let’s talk shop about the tools that make our houses feel like homes!