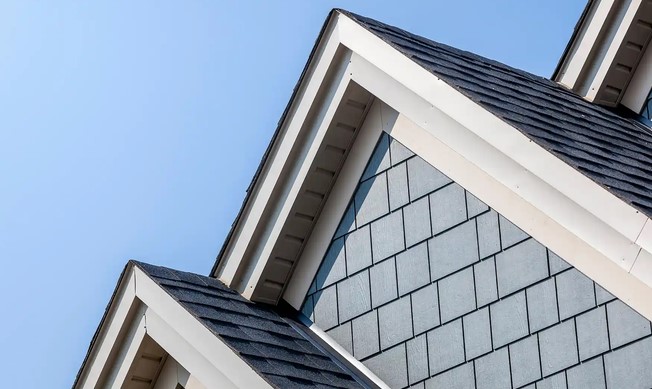
During a routine roofline evaluation last spring, I grabbed a ladder to inspect a client’s sagging aluminum gutter. As I pulled on the gutter bracket, my hand sank two inches deep into what felt like wet, soggy oatmeal. What the homeowner assumed was a simple loose screw was actually a structural failure: water had traveled beneath the drip edge, rotting out 16 linear feet of wood and compromising the rafter tails behind it.
In my over ten years of hands-on experience in residential construction and building envelope restoration, I have seen this exact nightmare play out dozens of times. Homeowners happily spend money on shiny architectural shingles, yet ignore the vertical transition board running along their eaves.
The fascia board is your home’s primary line of defensive armor where the roof deck meets the exterior walls. Performing a proper, technical-grade fascia board repair isn’t just about making your roofline look fresh—it is about hardening your building envelope against moisture intrusion, wood-destroying organisms, and expensive structural framing rot.
Anatomy of the Eave Assembly: Why Fascia Board Repair Is Critical
The eave system is a highly dynamic structural junction. It endures heavy wind loads, continuous thermal expansion, and thousands of gallons of cascading rainwater each season.
Think of your roofline assembly like a waterproof rain jacket over your house. Your shingles are the waterproof fabric, but the fascia board is the heavy-duty zipper along the bottom edge. If that zipper breaks down, water sweeps right underneath the jacket, soaking your underlying clothing (the rafter tails, soffit vents, and interior wall framing).
Executing a timely fascia board repair preserves structural stability across several key components:
-
Gutter Anchor Anchorage: Fascia boards carry the heavy dead load of rain-filled gutters; rotted wood causes gutters to pitch backward or tear away entirely during heavy downpours.
-
Subfloor & Rafter Tail Protection: Water wicking back into the eave rots the structural rafter tails, turning a minor wood repair into a massive structural framing overhaul.
-
Pest Barrier Integrity: Soft, damp wood along the roofline serves as an open invitation for carpenter ants, termites, squirrels, and birds to breach your attic space.
Material Selection: Choosing the Right Substrate for Long-Term Durability
When executing a fascia board repair, selecting the right replacement substrate is critical. Modern building science offers advanced materials that outperform traditional untreated lumber.
| Substrate Material | Moisture Resistance | Structural Rigidity | Maintenance Requirements | Average Lifespan |
| Untreated Pine / Spruce | Very Low | Moderate | High (Requires frequent painting/sealing) | 5 – 10 Years |
| Cedar / Redwood | High (Natural Tannins) | High | Moderate (Needs periodic stain or paint) | 20+ Years |
| Cellular PVC (Azek, Kleer) | Exceptional (100% Waterproof) | Moderate (Requires tight fastener spacing) | Extremely Low (Impermeable to rot/pests) | 30+ Years |
| Fiber Cement (HardieTrim) | High | Exceptional | Low (Holds paint longer than wood) | 25+ Years |
While dimensional cedar remains a classic choice for traditional homes, cellular PVC or fiber cement substrates provide an impervious barrier that eliminates future rot cycles entirely.
Step-by-Step Blueprint: Executing an Engineered Fascia Board Repair
Replacing damaged fascia requires strict adherence to structural fasteners, proper bevel cuts, and flashing integration. Follow this professional workflow for a long-lasting installation.
       [ Shingle Overhang ]
               ||
       +-------||-------+
       |  [Metal Drip Edge]
       +-------||-------+
               ||  \  <--- Essential Flashing Lip (Drips water past fascia)
    ===========||====\==================
               ||    \
         +-----+------+  <--- Replacement Fascia Board
         |     |      |       (Beveled 45° Miter Scarf Joint)
         |     |      |
         +-----+------+
               ||
         [ Soffit Channel ]
               ||
        [ Structural Rafter Tail ]
Phase 1: Isolation, Inspection, and Selective Demolition
Carefully detach the gutter brackets along the damaged section. Use a flat pry bar and a reciprocating saw with a metal-cutting blade to sever the old, rusted face-nails holding the damaged fascia to the rafter ends.
Inspect the exposed rafter tails thoroughly. If you encounter soft or discolored wood on the rafter tips, scrape away the decayed fibers and treat the sound wood with a liquid borate wood preservative. If structural rot exceeds 1 inch of depth, sister a new pressure-treated 2x framing member alongside the existing rafter tail before installing new fascia.
Phase 2: Precision Cutting and Scarf Joint Geometry
Never butt two fascia boards together with a flat 90-degree square cut. As wood expands and contracts with humidity swings, a square butt joint will open up, creating a direct path for water intrusion.
Always cut the ends of your replacement boards at a 45-degree bevel angle (scarf joint) directly over the center of a rafter tail. Overlap the mitered cuts so that the outer board sheds water away from the joint seam rather than funneling water inward.
Phase 3: Fastening, Flashing Integration, and Sealing
Secure the new board to each rafter tail using two hot-dipped galvanized or stainless steel ring-shank casing nails (or structural exterior trim screws). Fasteners must penetrate at least 1.5 inches into solid framing timber to resist wind uplift.
Ensure that the metal roof drip edge sits directly over the top edge of your new board. The bottom lip of the metal drip edge must extend out past the fascia by at least 0.5 inches to direct water runoff straight into the gutter trough.
Pro Tip: Always end-seal every single raw wood cut before nailing the board into place. Apply an exterior-grade alkyd primer or a dedicated end-grain wood sealer to fresh field cuts. The porous end-grain of lumber acts like a bundle of tiny drinking straws, drawing in moisture up to ten times faster than the face of the board!
Hidden Warning: Beware of the “Hidden Drip Edge Gap.” Installing a new fascia board without verifying that the metal drip edge sits over the top edge of the board guarantees failure. If the drip edge is installed behind the fascia, roof runoff will run straight down behind the board, rotting out your brand-new repair from the inside out within two seasons.
Sealing and Finishing for Maximum Longevity
Completing your fascia board repair requires high-performance surface preparation to protect your investment from harsh UV rays and rain.
-
Acrylic Urethane Sealants: Seal all scarf joints, corner miters, and nail holes with a high-flexibility, exterior-grade polyurethane or elastomeric acrylic sealant.
-
100% Acrylic Exterior Latex Paint: Apply one coat of premium exterior primer followed by two coats of 100% acrylic latex paint to create a durable, flexible coating that expands and contracts with seasonal temperature changes.
-
Aluminum Drip Edge Check: Inspect all gutter aprons and drip edge flashing to confirm that water flows directly into the gutter system without pooling along the bottom edge of the fascia.
Hardening Your Home’s Roofline Today
A successful fascia board repair is more than just a quick visual facelift—it is a critical building science intervention that protects your home’s framing, interior ceilings, and structural integrity. By choosing rot-resistant materials, executing precision scarf joints, and maintaining proper flashing details, you build a resilient eave assembly designed to withstand the harshest weather.
Are you dealing with soft spots along your roofline, or planning a gutter replacement project this season? Drop your questions, repair photos, or roofline challenges in the comments below, and let’s get your building envelope built right!