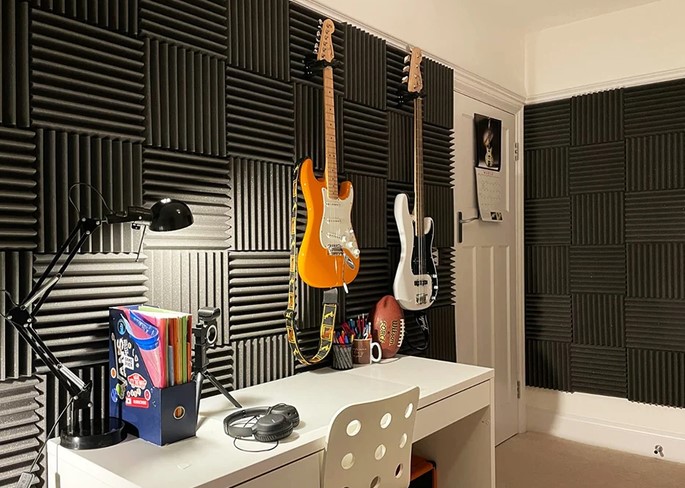
You’ve spent hard-earned money setting up a high-end home studio, a dedicated gaming room, or a home office. You plug in your microphone, hit record or start a video call, and test your audio—only to hear your voice bouncing off the walls like an echo chamber.
It sounds hollow, distant, and uninspiring.
Over my decade of hands-on experience in home improvement and residential acoustic retrofitting, I’ve seen hundreds of clients make the exact same initial mistake: slapping up a few decorative panels randomly on the wall and expecting studio-grade silence. True sound management using acoustic foam tiles isn’t about blocking external noise; it is about sculpting the air pressure inside your room with scientific precision.
Soundproofing vs. Sound Absorption: The Fundamental Myth
Before unboxing a single foam panel, we need to clear up the single biggest misconception in room acoustics.
Many beginners buy foam panels thinking they will stop their neighbors from hearing loud music or block street traffic noise. They are inevitably disappointed.
-
Soundproofing (Isolation): Blocks sound from entering or leaving a room. It requires mass, mechanical decoupling, and airtight construction (think heavy drywall, mass-loaded vinyl, and green glue).
-
Sound Absorption (Acoustic Treatment): Manages sound waves inside the room. It controls flutter echo, tames harsh reflections, and shortens reverberation time ($RT_{60}$).
+---------------------+----------------------------------+------------------------------------+
| Feature             | Soundproofing (Isolation)        | Acoustic Foam Tiles (Treatment)    |
+---------------------+----------------------------------+------------------------------------+
| Primary Purpose     | Block sound transmission in/out  | Reduce echo and internal reflections|
| Key Material Trait  | Heavy, dense, and airtight       | Porous, open-cell structure        |
| Target Frequencies  | Full spectrum (Focus on low bass)| Mid to high frequencies            |
| Installation Effort | Major construction required      | Easy surface mounting              |
+---------------------+----------------------------------+------------------------------------+
Installing acoustic foam tiles is like putting shock absorbers on a sports car. The foam won’t stop the car from hitting bumps (external noise), but it prevents the cabin from shaking violently out of control (internal echo).
The Science of Open-Cell Polyurethane Foam
How does a lightweight wedge or pyramid-shaped piece of foam transform muddy audio into crystal-clear sound? It comes down to thermodynamics and porous absorption mechanics.
Converting Kinetic Energy into Thermal Energy
Quality acoustic panels are manufactured from open-cell polyurethane foam. When a sound wave strikes an open-cell structure, the oscillating air particles enter millions of tiny interconnected air pockets inside the foam.
As the sound waves navigate this complex labyrinth, friction builds up between the air particles and the flexible pore walls. This friction converts kinetic sound energy into microscopic amounts of heat energy, effectively absorbing the wave rather than letting it bounce back into your room.
Understanding NRC Ratings and Density
Not all foam is created equal. Foam density (measured in pounds per cubic foot or $\text{kg/m}^3$) determines how effectively a panel absorbs sound across different frequencies.
-
Noise Reduction Coefficient (NRC): A rating scale from 0,0 (total reflection) to 1,0 (total absorption).
-
Thickness Matters: 1-inch foam typically handles high frequencies (above 2 kHz), while 2-inch or 4-inch foam reaches lower into the mid-range frequencies (down to 500 Hz).
Strategic Placement: Maximizing Performance Without Over-Damping
One of the worst mistakes you can make is covering every square inch of your walls with foam. Over-treating a room creates a dead, unnatural microclimate that causes ear fatigue during long working sessions.
Step 1: Target the First Reflection Points
The first reflection point is the exact spot on a wall or ceiling where sound travels directly from your speaker, bounces off the boundary, and hits your ears.
Pro Tip: Use the “Mirror Trick.” Sit in your primary listening position and have a friend slide a handheld mirror along the side wall at eye height. Wherever you see the reflection of your studio monitor or microphone speaker in the mirror, mark that spot with painter’s tape. That is your primary target for acoustic foam tiles.
Step 2: Treat Parallel Surface Reflection (Flutter Echo)
Stand in the middle of your room and clap your hands sharply. If you hear a ringing, metallic flutter sound, your flat parallel walls are bouncing mid and high frequencies back and forth rapidly.
Mounting panels in a checkerboard pattern on opposing walls breaks up these standing parallel waves without making the space feel unnaturally suffocating.
Step 3: Address the Corners with Bass Traps
Standard wedge or pyramid tiles are physically too thin to absorb long, powerful low-frequency sound waves. Bass energy naturally accumulates in 90-degree room corners. Always pair your surface foam with thick, dense foam corner bass traps to prevent low-end boominess from masking your mid-range clarity.
Installation Guide: Clean Mounting Without Destroying Drywall
In my early installation days, I saw plenty of clients ruin their fresh wall paint by applying industrial spray adhesives directly to paper-faced drywall. When it came time to move or reconfigure, half the sheetrock paper came off with the foam.
Here is the professional, damage-free method for mounting acoustic foam tiles:
-
The Painter’s Tape & Super Glue Method: Apply strips of high-tack blue painter’s tape directly to the drywall. Apply a matching strip of tape to the flat back of your foam panel. Apply a small bead of CA glue or hot glue between the two tape backings and press firmly for 30 seconds.
-
The Mounting Board Approach: Spray-adhere your foam tiles onto lightweight 3 mm MDF or corrugate plastic sheets cut to size. Then, hang the entire finished array like a light picture frame using small picture nails or heavy-duty Command strips.
Avoid buying cheap “egg-crate” packing foam from local craft stores. Packing foam features a closed-cell structure designed for cushioning, not sound absorption. It reflects sound back into the room and carries high fire hazard risks due to a lack of flame-retardant chemical treatment (look for Class A fire-rated acoustic foam only).
Final Thoughts: Sculpt Your Room’s Sonic Profile
Creating an acoustically balanced environment isn’t reserved for multi-million dollar recording facilities. By understanding how acoustic foam tiles interact with sound waves, selecting the right panel thickness, and placing them strategically at first reflection points, you can dramatically enhance your audio recording quality, room clarity, and overall listening experience.
What does your current setup look like? Have you been fighting stubborn echoes or planning a dedicated acoustic overhaul in your home workspace? Share your setup details, challenges, or questions in the comments below!