Did you know that up to 50% of the air you breathe on the first floor of your home originates directly from your crawl space?
A few years ago, I inspected a home in South Carolina where the owner complained of bouncy hardwood floors and a persistent, musty smell that no air purifier could fix. Crawling underneath the floor joists with a flashlight, I found a nightmare scenario: heavy droplets of condensation hanging off sagging fiberglass insulation, subfloor plywood rotting at the seams, and dark mold creeping across the joists. The cause wasn’t a plumbing leak or a flooded yard—it was raw, unsealed earth constantly breathing moisture upward into the home.
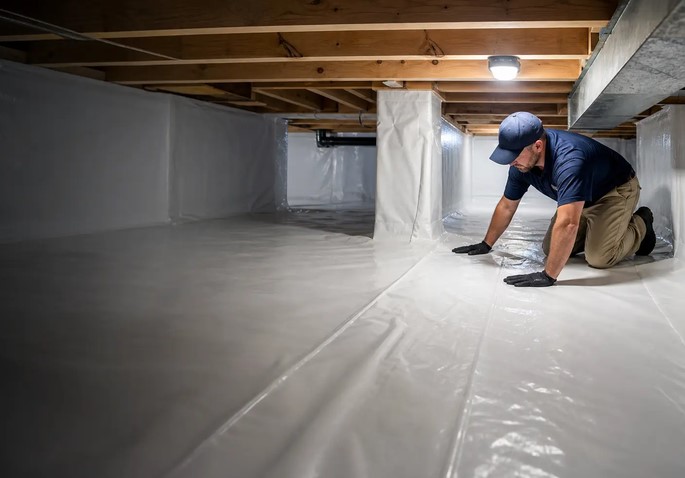
We cleared out the ruined insulation, laid a heavy-duty continuous liner, and sealed every seam tight. Within a week, the indoor humidity dropped dramatically, the musty odor vanished, and the floor structure was stabilized.
Over my 10+ years as a home improvement contractor, I have seen unmanaged crawl space moisture quietly destroy structural timbers and compromise indoor air quality. Installing a proper crawl space vapor barrier is one of the single most effective ways to protect your home’s building envelope and safeguard your family’s health.
The Stack Effect: How Your House Breathes Moisture
To understand why a crawl space liner is so critical, you have to understand a fundamental principle of building science called the Stack Effect.
Think of your home like a giant vertical chimney. As warm air rises and escapes through your attic vents and upper-floor windows, it creates a negative pressure vacuum at the bottom of the house. This vacuum aggressively sucks air—and everything floating in it—upward through every unsealed gap, pipe penetration, and floorboard seam in your crawl space.
If your crawl space consists of exposed dirt, ground moisture evaporates continuously into that enclosed subfloor cavity. That high relative humidity (often exceeding 80–90%) feeds wood-destroying fungi, rots floor joists, ruins insulation, and drifts directly up into your living rooms.
+--------------------------+-----------------------+-----------------------+-------------------------+
| Barrier Material / Thickness| Tear Resistance    | Puncture Protection   | Perm Rating (Permeability)|
+--------------------------+-----------------------+-----------------------+-------------------------+
| 6-Mil Clear Polyethylene | Extremely Low         | Poor (Tears Easily)   | ~ 0.06 Perms            |
| 10-Mil String-Reinforced | Moderate              | Good                  | ~ 0.03 Perms            |
| 12-Mil Virgin Polyolefin | High                  | Exceptional           | ~ 0.018 Perms           |
| 20-Mil Commercial Liner  | Industrial Grade      | Maximum               | < 0.01 Perms            |
+--------------------------+-----------------------+-----------------------+-------------------------+
Material Selection: Why 6-Mil Plastic Just Won’t Cut It
A common mistake I see budget-conscious homeowners make is running to the local hardware store and buying cheap 6-mil clear plastic sheeting meant for painting drop cloths.
6-mil clear polyethylene breaks down quickly in damp crawl space environments. It tears the moment you crawl over it to inspect plumbing, off-gasses bad odors, and turns brittle within a couple of years.
The Superiority of Heavy-Duty Polyolefin
For true long-term crawl space vapor protection, you should install a 12-mil to 20-mil string-reinforced polyolefin membrane.
-
High-density virgin polyolefins are engineered specifically to resist puncture damage from rocks or gravel.
-
String reinforcement (scrim layer) stops small tears from ripping open across the entire floor.
-
A low perm rating (under 0.02) ensures that ground water vapor cannot diffuse through the material over decades of service.
Encapsulation vs. Basic Ground Covering
When upgrading your crawl space, you need to decide whether a basic ground cover or a full system encapsulation fits your climate and budget.
-
Class 1 Vapor Retarder (Ground Cover Only): Covering 100% of the exposed dirt floor with a plastic membrane, overlapping seams by 12 inches, and taping them tight. This blocks raw ground moisture from evaporating but leaves wall vents open to outside air.
-
Full Crawl Space Encapsulation: Covering the dirt floor, extending the membrane all the way up the foundation walls (stopping 3 inches short of the sill plate for termite inspection access), sealing external wall vents shut, and installing a dedicated crawl space dehumidifier or supply-air fan.
For humid regions or homes with chronic moisture issues, full encapsulation is the absolute gold standard for building envelope protection.
Step-by-Step Installation Protocol for Pro-Grade Protection
Laying a durable crawl space vapor barrier requires meticulous preparation. Skimping on floor prep or seam sealing will compromise the entire barrier’s effectiveness.
Expert Advice: Pro Tips and Hidden Traps
⚠️ The Termite Inspection Gap
Never run a vapor barrier membrane all the way up to touch the wooden sill plate or band joist on your foundation walls! Termites love building mud tubes hidden behind plastic liners to reach your home’s framing undetected. Always leave a 3-inch to 4-inch exposed concrete gap at the top of the foundation wall as an inspection strip for pest control professionals.
Addressing Standing Water First
A vapor liner blocks ground moisture evaporation, but it is not a substitute for primary waterproofing.
If water actively puddles in your crawl space after heavy rains from high groundwater or exterior drainage issues, you must resolve that water intrusion first. Install a perimeter French drain and a heavy-duty sump pump system underneath or beside your vapor liner before sealing the space.
💡 Pro Tip from the Field
Before rolling out your heavy 12-mil or 20-mil membrane over rough, sharp gravel or rocky ground, lay down a low-cost, non-woven geotextile fabric underlayment first. This cushions the liner from below, making crawling over it comfortable and ensuring zero punctures.
Take Control of Your Home’s Foundation Health
Protecting your crawl space isn’t just about preserving floor joists—it’s about creating a healthy, energy-efficient, and structurally sound home from the ground up. By installing a high-grade crawl space vapor barrier, sealing seams meticulously, and controlling subfloor relative humidity, you eliminate mold hazards, safeguard air quality, and save big on heating and cooling bills.
Have you checked the condition of your home’s crawl space lately? What challenges are you facing with subfloor humidity or musty odors in your house? Leave a comment below with your questions or share photos of your crawl space setup—I’d love to help you build a dry, durable foundation!