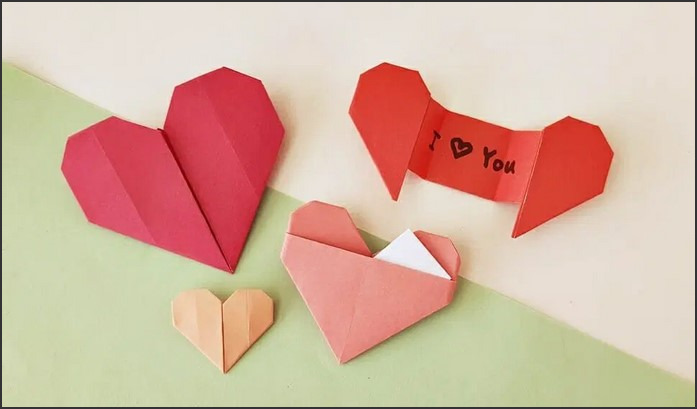
Origami Elegance is a unique way to create a special gift for someone special. With just a few simple steps, you can create an origami heart envelope that is perfect for any special occasion. Whether it’s a birthday, anniversary, or just to show someone you care, this origami heart envelope is sure to make a lasting impression. With its intricate design and beautiful colors, this origami heart envelope is sure to be a hit. So, let’s get started and learn how to make this special origami heart envelope!
Step-by-Step Guide to Crafting an Origami Heart Envelope for Special Occasions
Origami is a traditional Japanese art form that involves folding paper into intricate shapes and designs. It is a popular craft activity for special occasions, such as Valentine’s Day, anniversaries, and birthdays. One of the most popular origami projects is the origami heart envelope, which is a great way to give a special gift or card to someone you love. This step-by-step guide will show you how to craft an origami heart envelope for any special occasion.
Materials Needed:
• Square sheet of paper
• Scissors
• Glue
Instructions:
1. Begin by folding the square sheet of paper in half diagonally. Unfold the paper and then fold it in half the other way. Unfold the paper again.
2. Fold the top two corners of the paper down to the center crease. Unfold the paper.
3. Fold the bottom two corners of the paper up to the center crease. Unfold the paper.
4. Fold the top two corners of the paper down to the center crease again. Unfold the paper.
5. Fold the bottom two corners of the paper up to the center crease again. Unfold the paper.
6. Fold the top two corners of the paper down to the center crease a third time. Unfold the paper.
7. Fold the bottom two corners of the paper up to the center crease a third time. Unfold the paper.
8. Fold the top two corners of the paper down to the center crease a fourth time. Unfold the paper.
9. Fold the bottom two corners of the paper up to the center crease a fourth time. Unfold the paper.
10. Fold the top two corners of the paper down to the center crease a fifth time. Unfold the paper.
11. Fold the bottom two corners of the paper up to the center crease a fifth time. Unfold the paper.
12. Fold the top two corners of the paper down to the center crease a sixth time. Unfold the paper.
13. Fold the bottom two corners of the paper up to the center crease a sixth time. Unfold the paper.
14. Fold the top two corners of the paper down to the center crease a seventh time. Unfold the paper.
15. Fold the bottom two corners of the paper up to the center crease a seventh time. Unfold the paper.
16. Fold the top two corners of the paper down to the center crease an eighth time. Unfold the paper.
17. Fold the bottom two corners of the paper up to the center crease an eighth time. Unfold the paper.
18. Fold the top two corners of the paper down to the center crease a ninth time. Unfold the paper.
19. Fold the bottom two corners of the paper up to the center crease a ninth time. Unfold the paper.
20. Fold the top two corners of the paper down to the center crease a tenth time. Unfold the paper.
21. Fold the bottom two corners of the paper up to the center crease a tenth time. Unfold the paper.
22. Fold the top two corners of the paper down to the center crease an eleventh time. Unfold the paper.
23. Fold the bottom two corners of the paper up to the center crease an eleventh time. Unfold the paper.
24. Fold the top two corners of the paper down to the center crease a twelfth time. Unfold the paper.
25. Fold the bottom two corners of the paper up to the center crease a twelfth time. Unfold the paper.
26. Fold the top two corners of the paper down to the center crease a thirteenth time. Unfold the paper.
27. Fold the bottom two corners of the paper up to the center crease a thirteenth time. Unfold the paper.
28. Fold the top two corners of the paper down to the center crease a fourteenth time. Unfold the paper.
29. Fold the bottom two corners of the paper up to the center crease a fourteenth time. Unfold the paper.
30. Fold the top two corners of the paper down to the center crease a fifteenth time. Unfold the paper.
31. Fold the bottom two corners of the paper up to the center crease a fifteenth time. Unfold the paper.
32. Fold the top two corners of the paper down to the center crease a sixteenth time. Unfold the paper.
33. Fold the bottom two corners of the paper up to the center crease a sixteenth time. Unfold the paper.
34. Fold the top two corners of the paper down to the center crease a seventeenth time. Unfold the paper.
35. Fold the bottom two corners of the paper up to the center crease a seventeenth time. Unfold the paper.
36. Fold the top two corners of the paper down to the center crease an eighteenth time. Unfold the paper.
37. Fold the bottom two corners of the paper up to the center crease an eighteenth time. Unfold the paper.
38. Fold the top two corners of the paper down to the center crease a nineteenth time. Unfold the paper.
39. Fold the bottom two corners of the paper up to the center crease a nineteenth time. Unfold the paper.
40. Fold the top two corners of the paper down to the center crease a twentieth time. Unfold the paper.
41. Fold the bottom two corners of the paper up to the center crease a twentieth time. Unfold the paper.
42. Fold the top two corners of the paper down to the center crease a twenty-first time. Unfold the paper.
43. Fold the bottom two corners of the paper up to the center crease a twenty-first time. Unfold the paper.
44. Fold the top two corners of the paper down to the center crease a twenty-second time. Unfold the paper.
45. Fold the bottom two corners of the paper up to the center crease a twenty-second time. Unfold the paper.
46. Fold the top two corners of the paper down to the center crease a twenty-third time. Unfold the paper.
47. Fold the bottom two corners of the paper up to the center crease a twenty-third time. Unfold the paper.
48. Fold the top two corners of the paper down to the center crease a twenty-fourth time. Unfold the paper.
49. Fold the bottom two corners of the paper up to the center crease a twenty-fourth time. Unfold the paper.
50. Cut along the center crease to create two triangles.
How to Make an Origami Heart Envelope for a Special Gift: Tips and Tricks for Crafting Elegant Envelopes
Crafting an origami heart envelope is a great way to add a special touch to a gift. This simple yet elegant envelope is sure to make the recipient feel extra special. With a few simple steps, you can create a beautiful envelope that will make your gift stand out. Here are some tips and tricks for crafting an origami heart envelope.
First, you will need to gather the necessary materials. You will need a square piece of paper, scissors, and a ruler. You can use any type of paper you like, but cardstock or construction paper works best.
Next, you will need to measure and cut the paper. Measure the paper to be four inches by four inches. Then, cut the paper along the lines you have drawn.
Once you have the paper cut, you will need to fold it in half. Make sure the edges are even and the paper is folded in half lengthwise. Then, fold the paper in half again, this time widthwise.
Now, you will need to make the heart shape. Start by folding the top corner of the paper down to the bottom corner. Then, fold the left corner of the paper to the right corner. Finally, fold the top corner of the paper down to the bottom corner again.
Once you have the heart shape, you will need to make the envelope. Start by folding the top of the heart down to the bottom. Then, fold the left side of the heart to the right side. Finally, fold the top of the heart down to the bottom again.
Now, you will need to secure the envelope. You can use a piece of tape or a glue stick to secure the envelope. Make sure the edges are sealed tightly.
Finally, you can decorate the envelope. You can use markers, stickers, or other decorations to make the envelope look extra special.
By following these simple steps, you can create an origami heart envelope for a special gift. This elegant envelope is sure to make the recipient feel extra special. With a few simple materials and a bit of creativity, you can craft a beautiful envelope that will make your gift stand out.Origami Elegance: Creating an Origami Heart Envelope for Special Occasions is a great way to add a special touch to any special occasion. It is a simple and fun craft that can be enjoyed by all ages. With a few simple steps, you can create a beautiful and unique origami heart envelope that will be sure to impress your friends and family. Whether you are looking for a unique way to give a gift or just want to add a special touch to a special occasion, origami heart envelopes are a great way to do so.