It takes less than one-tenth of an Ampere of electricity to put a human heart into fatal fibrillation. To put that in perspective, a standard hair dryer pulls about 15 Amps. That means the electrical current powering your morning routine carries enough raw energy to be fatal many times over if it takes a detour through your body.
Years ago, during my early days doing residential remodeling, I got a call from a frantic homeowner whose kitchen remodel had been done by a “handyman friend.” While wiping down a damp countertop, she plugged in a blender and felt a massive, muscle-locking shock that threw her backward. When I pulled that receptacle out of the wall, my jaw dropped. It was a standard outlet sitting less than two feet from the kitchen sink—a direct, blatant code violation.
That close call could have been completely avoided with a proper GFCI Outlet Install. Ground Fault Circuit Interrupters (GFCIs) are not just arbitrary code requirements; they are your home’s frontline defensive shield against electrocution. Let’s break down how these life-saving devices work, where you absolutely need them, and how to execute the install protocol like a seasoned pro.
The Invisible Watchman: How a GFCI Actually Works
Most people think a standard circuit breaker protects them from getting shocked. That is a dangerous misconception. A standard breaker is designed to protect your house from burning down; it trips when wires get too hot from carrying too much current. It doesn’t care if that current is traveling through a copper wire or your right arm.
The Balancing Scale Analogy
To understand a GFCI, imagine a perfectly balanced old-school scale. On one side, you have the electrical current flowing out through the hot wire (the black wire). On the other side, you have the current returning in through the neutral wire (the white wire).
[Hot Wire: 5.00 Amps]  --->  [Appliance]  --->  [Neutral Wire: 5.00 Amps]  == BALANCE (Safe)
[Hot Wire: 5.00 Amps]  --->  [Fault/You]   --->  [Neutral Wire: 4.95 Amps]  == IMBALANCE (GFCI Trips!)
A GFCI acts as an incredibly sensitive internal monitor that constantly measures these two sides. If even a tiny fraction of current—as little as 4 to 6 milliamperes—leaks out (a “ground fault”), the scale tips. The GFCI detects this missing current in less than one-thirtieth of a second and instantly snaps the power shut before the electricity can cause your heart to stop.
Mapping Your Home: Where You Must Prioritize a GFCI Outlet Install
The National Electrical Code (NEC) updates its guidelines constantly, but the golden rule for GFCIs has remained steady: anywhere electricity and moisture can shake hands, a GFCI must be present.
If you live in an older home built before the late 1970s, chances are your wet areas are still rocking standard, unprotected outlets. Here is where you need to upgrade immediately:
-
Kitchens: All receptacles serving countertop surfaces, especially those within 6 feet of the sink.
-
Bathrooms: Every single outlet, no exceptions.
-
Basements and Crawl Spaces: Unfinished basements are notorious for damp concrete floors, which ground your body and increase shock hazards.
-
Outdoors and Garages: Exterior outlets face rain, snow, and morning dew, making them high-risk zones.
Line vs. Load: The Critical Technical Trap That Trips Up DIYers
In my ten-plus years of home improvement, the single biggest mistake I see intermediate DIYers make during a GFCI Outlet Install is mixing up the Line and Load terminals.
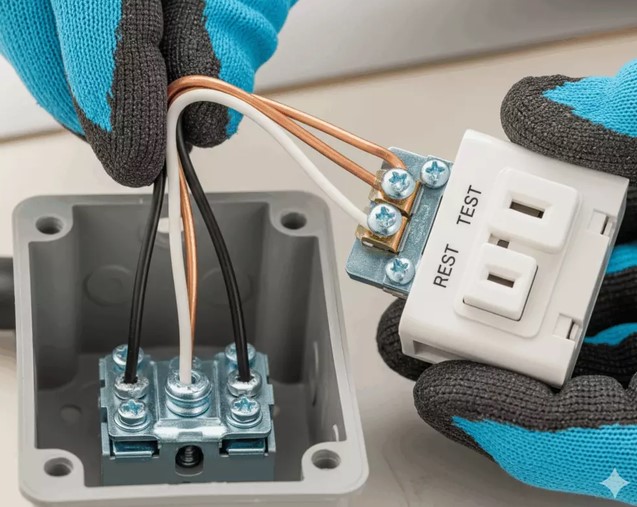
When you unbox a new GFCI receptacle, you will notice four screw terminals on the back, usually hidden under a yellow piece of warning tape.
The Difference Matters
-
The LINE Terminals: This is where your incoming raw power connects. These wires come directly from your electrical panel breaker.
-
The LOAD Terminals: This side is used to pass GFCI protection down the line to “downstream” standard outlets on the same circuit.
If you accidentally connect your incoming hot and neutral wires to the Load terminals instead of the Line terminals, the outlet face might still power your devices, but the internal safety trip mechanism will not function. You will have zero shock protection. Always read the stamps on the back of the device plastic carefully before stripping your wires.
Step-by-Step Blueprint: Executing the GFCI Outlet Install Protocol
Working with residential electricity requires absolute discipline. If you feel hesitant at any stage of this protocol, stop and call a licensed electrician. But if you have a solid grasp of basic hand tools and safety measures, here is how to upgrade your outlet safely.
Prerequisite Tools:
-
Non-contact voltage tester
-
Wire strippers/cutters
-
Insulated screwdrivers (Phillips and Flathead)
-
New GFCI receptacle (Ensure it matches your circuit: 15-Amp or 20-Amp)
💡 Pro Tip: The “Don’t Over-Buy” Budget Saver
You do not need to buy a separate, expensive GFCI outlet for every single box in a room. Because of the Load terminal feature we talked about earlier, installing just one GFCI outlet at the very beginning of a circuit run will automatically protect every standard, cheap outlet that comes after it. Find the “first” box in the room, install your GFCI there, and run the rest of the room off the Load side!
Safety First: A Professional’s Closing Advice
Upgrading your home’s infrastructure is a journey of small, impactful choices. While remodeling a kitchen layout or painting a living room updates the aesthetics, executing a proper GFCI Outlet Install preserves the lives of the people walking through those spaces. It is a true weekend-warrior project that delivers massive peace of mind for under twenty bucks.
Take a walk through your home this week with a pad of paper. Look under your kitchen cabinets, behind your bathroom vanities, and out on your patio. If you spot standard outlets within splashing distance of water, it’s time to schedule an upgrade.
Have you ever encountered confusing, tangled wiring while trying to swap out an old outlet? Do you have questions about tracking down the “first” outlet on a circuit run? Drop your thoughts, layout questions, or DIY stories in the comments section below—I read and reply to them all! Let’s work together to make our homes safer, one circuit at a time.