Window Wonders: Creative Window Treatments for Unique Home Decor

Source : https://www.thespruce.com

Welcome to Window Wonders! We are a company that specializes in creating unique and creative window treatments for your home. Our goal is to provide you with the perfect window treatments to enhance the beauty of your home and make it stand out from the rest. We offer a wide variety of window treatments, from traditional to modern, to fit any style and budget. Whether you are looking for something to add a touch of elegance to your living room or something to make your bedroom more cozy, we have the perfect window treatments for you. With our experienced team of designers, we can help you create the perfect window treatments for your home.

Get Creative with Window Treatments: Tips for Unique Home Decor

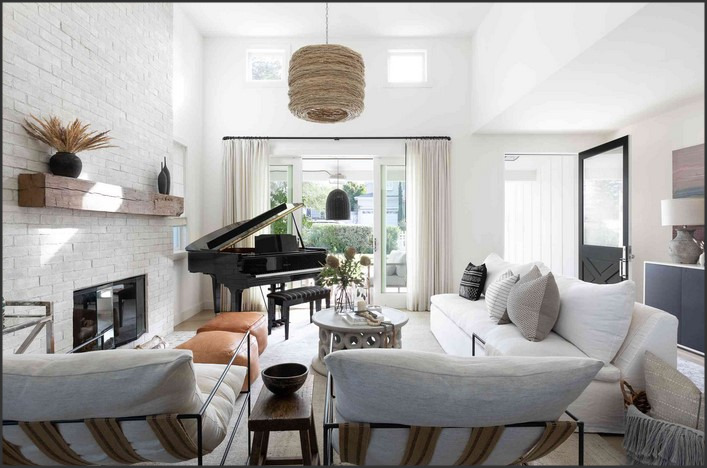
Window treatments are an important part of home decor, as they can add a unique touch to any room. With the right window treatments, you can create a unique look that will make your home stand out from the rest. Here are some tips for getting creative with window treatments to create a unique home decor.

1. Consider the Color Scheme: When selecting window treatments, consider the color scheme of the room. Choose colors that complement the existing decor and create a cohesive look. If you’re looking for something more unique, try using a bold color or pattern to make a statement.

2. Mix and Match: Don’t be afraid to mix and match different window treatments. For example, you could pair a sheer curtain with a bold patterned valance. This will create an interesting contrast and add visual interest to the room.

3. Add Texture: Adding texture to your window treatments can create a unique look. Try using fabrics with different textures, such as velvet, linen, or burlap. This will add depth and interest to the room.

4. Use Unexpected Materials: Get creative with your window treatments by using unexpected materials. For example, you could use a vintage scarf as a curtain or hang a tapestry as a valance. This will add a unique touch to the room.

5. Hang Artwork: Hang artwork or photographs on the window treatments to create a unique look. This will add a personal touch to the room and make it feel more inviting.

By following these tips, you can create a unique home decor with window treatments. With the right materials and colors, you can create a look that is both stylish and unique.

DIY Window Treatments: How to Create Unique Home Decor on a Budget

Creating unique window treatments on a budget can be a great way to add a personal touch to your home decor. With a few simple materials and a bit of creativity, you can create beautiful window treatments that will add a unique touch to any room.

The first step in creating unique window treatments is to decide on the type of window treatment you would like to create. There are many different types of window treatments, such as curtains, blinds, shades, and valances. Consider the style of the room and the amount of light you would like to let in when deciding on the type of window treatment you would like to create.

Once you have decided on the type of window treatment you would like to create, you will need to gather the necessary materials. For curtains, you will need fabric, curtain rods, and curtain rings. For blinds, you will need blinds, brackets, and screws. For shades, you will need fabric, shade rods, and shade rings. For valances, you will need fabric, a valance rod, and a valance ring.

Once you have gathered the necessary materials, you can begin creating your window treatments. For curtains, measure the window and cut the fabric to the desired length. Hem the edges of the fabric and attach the curtain rings to the top of the fabric. Hang the curtains on the curtain rod and adjust the length as needed.

For blinds, measure the window and cut the blinds to the desired length. Attach the brackets to the window frame and hang the blinds on the brackets. Adjust the length of the blinds as needed.

For shades, measure the window and cut the fabric to the desired length. Hem the edges of the fabric and attach the shade rings to the top of the fabric. Hang the shades on the shade rod and adjust the length as needed.

For valances, measure the window and cut the fabric to the desired length. Hem the edges of the fabric and attach the valance ring to the top of the fabric. Hang the valance on the valance rod and adjust the length as needed.

Creating unique window treatments on a budget can be a great way to add a personal touch to your home decor. With a few simple materials and a bit of creativity, you can create beautiful window treatments that will add a unique touch to any room.Window Wonders: Creative Window Treatments for Unique Home Decor is a great resource for anyone looking to add a unique touch to their home decor. With a wide variety of window treatments to choose from, you can easily find something that fits your style and budget. Whether you’re looking for something traditional or something more modern, Window Wonders has something for everyone. With their helpful tips and advice, you can be sure to find the perfect window treatment for your home.

Granite Grounds: Where to Buy Decomposed Granite for Your Landscaping

Granite Grounds is the premier destination for all your decomposed granite needs. We offer a wide selection of decomposed granite in various colors and sizes, perfect for any landscaping project. Our experienced staff is knowledgeable and can help you find the perfect product for your project. We also offer delivery services to make sure your order arrives on time and in perfect condition. Whether you’re looking for a small amount of decomposed granite for a walkway or a large quantity for a patio, Granite Grounds has the perfect product for you.

Exploring the Benefits of Decomposed Granite for Your Landscaping: Where to Buy It

Decomposed granite is a popular material for landscaping projects due to its versatility and affordability. It is a natural material that is composed of small pieces of granite that have been weathered and broken down over time. Decomposed granite is available in a variety of colors and textures, making it an ideal choice for a variety of landscaping projects.

The benefits of using decomposed granite for landscaping projects are numerous. It is a low-maintenance material that is easy to install and requires minimal upkeep. It is also an affordable option that can be used to create a variety of looks, from a natural, rustic feel to a more modern, contemporary look. Decomposed granite is also a great choice for pathways and walkways, as it provides a stable surface that is slip-resistant and easy to walk on.

When it comes to finding the right decomposed granite for your landscaping project, it is important to consider the type of look you are trying to achieve. Different colors and textures of decomposed granite can be used to create different effects. For example, a darker color of decomposed granite can be used to create a more formal look, while a lighter color can be used to create a more natural, rustic feel.

When it comes to purchasing decomposed granite for your landscaping project, there are a few different options available. Many home improvement stores and garden centers carry a variety of decomposed granite products. Additionally, there are a number of online retailers that specialize in selling decomposed granite. These retailers often offer a wide selection of colors and textures, as well as competitive prices.

Decomposed granite is an excellent choice for landscaping projects due to its versatility and affordability. With the right selection of colors and textures, it can be used to create a variety of looks. When it comes to purchasing decomposed granite, there are a number of options available, from home improvement stores and garden centers to online retailers. With the right selection, you can find the perfect decomposed granite for your landscaping project.

How to Choose the Right Decomposed Granite for Your Landscaping Project: Tips from Granite Grounds

Decomposed granite is a popular material for landscaping projects due to its versatility and affordability. It can be used to create pathways, driveways, patios, and other outdoor features. However, choosing the right decomposed granite for your project can be a challenge. Here are some tips from Granite Grounds to help you make the right choice:

1. Consider the Color: Decomposed granite comes in a variety of colors, from light tan to deep red. Choose a color that complements your existing landscaping and fits the overall aesthetic of your project.

2. Consider the Size: Decomposed granite is available in a range of sizes, from fine particles to larger chunks. Choose a size that is appropriate for the type of project you are undertaking. For example, larger chunks are better for pathways, while finer particles are better for patios.

3. Consider the Texture: Decomposed granite can be smooth or rough. Choose a texture that is appropriate for the type of project you are undertaking. For example, a smooth texture is better for pathways, while a rough texture is better for patios.

4. Consider the Drainage: Decomposed granite is porous and can help with drainage. Choose a material that is appropriate for the type of project you are undertaking. For example, a material with a higher porosity is better for pathways, while a material with a lower porosity is better for patios.

By following these tips from Granite Grounds, you can ensure that you choose the right decomposed granite for your landscaping project. With the right material, you can create a beautiful and functional outdoor space that will last for years to come.Granite Grounds is an excellent source for purchasing decomposed granite for landscaping projects. Their selection of products is vast and their prices are competitive. They also offer helpful advice and tips on how to use decomposed granite in landscaping projects. With their knowledgeable staff and quality products, Granite Grounds is the perfect place to purchase decomposed granite for any landscaping project.

Gateway to Elegance: How to Build a Gate Door for Your Property

Source : https://artboulle.com

Gateway to Elegance is a comprehensive guide to building a beautiful and secure gate door for your property. Whether you are looking to add a touch of elegance to your home or increase the security of your property, this guide will provide you with the information and resources you need to build a gate door that meets your needs. From selecting the right materials to installing the gate door, this guide will walk you through the entire process. With detailed instructions and helpful tips, you can be sure that your gate door will be both aesthetically pleasing and secure.

Step-by-Step Guide to Building a Beautiful Gate Door for Your Home with Gateway to Elegance

Introduction

Adding a beautiful gate door to your home can be a great way to add a touch of elegance and style to your property. A gate door can also provide an extra layer of security and privacy for your home. With Gateway to Elegance, you can easily build a beautiful gate door for your home. This step-by-step guide will walk you through the process of building a gate door with Gateway to Elegance.

Step 1: Choose Your Design

The first step in building a gate door with Gateway to Elegance is to choose your design. Gateway to Elegance offers a wide variety of gate door designs, from traditional to modern. You can also customize your gate door with a variety of colors, finishes, and hardware.

Step 2: Measure Your Space

Once you have chosen your design, you will need to measure the space where you plan to install your gate door. This will help you determine the size and shape of the gate door you need.

Step 3: Order Your Gate Door

Once you have chosen your design and measured your space, you can order your gate door from Gateway to Elegance. You can order your gate door online or by phone.

Step 4: Install Your Gate Door

Once your gate door has arrived, you can begin the installation process. Gateway to Elegance provides detailed instructions for installing your gate door. You may need to hire a professional to help with the installation process.

Step 5: Enjoy Your Gate Door

Once your gate door is installed, you can enjoy the beauty and elegance it adds to your home. You can also enjoy the added security and privacy that your gate door provides.

Conclusion

Building a beautiful gate door for your home with Gateway to Elegance is a simple and straightforward process. With a wide variety of designs and customization options, you can easily create a gate door that is perfect for your home. Follow the steps outlined in this guide to build a beautiful gate door for your home with Gateway to Elegance.

Get the Look You Want with Gateway to Elegance: Tips for Designing and Installing a Custom Gate Door

Installing a custom gate door can be a great way to add a touch of elegance to your home. Whether you’re looking for a classic wrought iron gate or a modern aluminum gate, there are a few tips to keep in mind when designing and installing a custom gate door.

First, consider the size and shape of the gate door. Measure the area where the gate will be installed and make sure the gate door will fit properly. If you’re installing a double gate, make sure there is enough room for both gates to open and close without hitting each other.

Next, decide on the material for the gate door. Wrought iron is a classic choice, but aluminum is also a popular option. Both materials are durable and can be customized to fit your style.

Once you’ve chosen the material, you’ll need to decide on the design. Consider the overall look of your home and choose a design that complements it. If you’re looking for a more modern look, consider a sleek, minimalist design. If you’re going for a more traditional look, choose a more ornate design.

Finally, you’ll need to install the gate door. If you’re not comfortable with this task, it’s best to hire a professional. Make sure the gate is securely installed and that all the hardware is properly tightened.

By following these tips, you can create a beautiful custom gate door that will add a touch of elegance to your home. With the right design and installation, you can create a gateway to elegance that will last for years to come.The Gateway to Elegance: How to Build a Gate Door for Your Property guide provides a comprehensive overview of the process of building a gate door for your property. From selecting the right materials to installing the gate door, this guide provides detailed instructions and helpful tips to ensure that your gate door is both aesthetically pleasing and secure. With the help of this guide, you can create a beautiful and secure gateway to your property that will last for years to come.

Bench Building Basics: How to Make a Simple and Sturdy Bench

Source : https://assetssc.leevalley.com

Bench Building Basics is a comprehensive guide to building a simple and sturdy bench. Whether you are a beginner or an experienced woodworker, this guide will provide you with the necessary information to build a bench that will last for years to come. This guide will cover the basics of bench building, from selecting the right materials to the tools and techniques needed to complete the project. With step-by-step instructions and helpful illustrations, you will be able to build a bench that is both functional and aesthetically pleasing. With the right materials and tools, you can create a bench that will be a beautiful addition to any room.

Step-by-Step Guide to Building a Simple and Sturdy Bench

Building a simple and sturdy bench is a straightforward project that can be completed in a few hours. With the right tools and materials, you can create a comfortable and attractive seating area for your home or garden. This step-by-step guide will walk you through the process of constructing a basic bench.

Materials Needed

Before you begin, make sure you have the following materials on hand:

• 2x4s (four 8-foot boards)

• 2x6s (two 8-foot boards)

• Wood screws

• Wood glue

• Sandpaper

• Paint or stain (optional)

Tools Needed

You will also need the following tools:

• Circular saw

• Drill

• Tape measure

• Pencil

• Safety glasses

• Work gloves

Step 1: Cut the 2x4s

Using the circular saw, cut the four 2x4s into four pieces that are each 24 inches long.

Step 2: Cut the 2x6s

Using the circular saw, cut the two 2x6s into two pieces that are each 24 inches long.

Step 3: Assemble the Frame

Lay the four 2x4s on a flat surface and arrange them in a rectangle. Secure the pieces together with wood screws and wood glue.

Step 4: Attach the 2x6s

Lay the two 2x6s on top of the 2×4 frame and secure them with wood screws and wood glue.

Step 5: Sand and Finish

Sand the bench to remove any rough edges and splinters. If desired, you can paint or stain the bench to give it a finished look.

Step 6: Enjoy!

Your bench is now ready to use. Enjoy your new seating area!

Essential Tools and Materials for Bench Building Basics

Building a bench requires a few essential tools and materials. To ensure a successful project, it is important to have the right tools and materials on hand. The following is a list of the basic tools and materials needed for bench building:

Tools:

• Circular saw: This is used to cut the wood to the desired size and shape.

• Drill: This is used to make holes for screws and other fasteners.

• Hammer: This is used to drive nails and other fasteners into the wood.

• Tape measure: This is used to measure the wood and ensure accurate cuts.

• Sandpaper: This is used to smooth the wood and remove any rough edges.

• Safety glasses: This is used to protect the eyes from sawdust and other debris.

Materials:

• Wood: This is the main material used to construct the bench. It is important to select the right type of wood for the project.

• Screws: This is used to secure the wood together.

• Nails: This is used to secure the wood together.

• Glue: This is used to secure the wood together.

• Finishing materials: This includes paint, stain, and sealer. This is used to protect the wood and give it a finished look.

• Fasteners: This includes bolts, nuts, and washers. This is used to secure the wood together.In conclusion, building a simple and sturdy bench is a great way to add a functional piece of furniture to any space. With the right materials and tools, anyone can build a bench that will last for years to come. With a few basic steps, you can create a beautiful and functional bench that will be the perfect addition to any room.

Wine Barrel Wonders: Crafting and Using Your Own Wine Barrel Creations

Source : https://www.barrelsonline.com

Wine Barrel Wonders: Crafting and Using Your Own Wine Barrel Creations is a comprehensive guide to creating and using your own wine barrel creations. This book provides detailed instructions on how to craft and use wine barrels for a variety of purposes, from furniture to planters and more. It also includes tips on selecting the right barrel for your project, as well as advice on how to care for and maintain your wine barrel creations. Whether you are a novice or an experienced woodworker, this book will provide you with the knowledge and skills you need to create beautiful and unique wine barrel creations.

How to Craft Your Own Wine Barrel Wonders: A Step-by-Step Guide

Introduction

Wine barrels are a great way to add a unique and rustic touch to any home. Not only do they look great, but they can also be used to craft a variety of items, from furniture to decorations. Crafting your own wine barrel wonders is a fun and rewarding project that can be done with minimal tools and materials. This step-by-step guide will provide you with the information you need to get started.

Step 1: Gather Your Materials

The first step in crafting your own wine barrel wonders is to gather the necessary materials. You will need a wine barrel, a saw, sandpaper, wood glue, screws, and any other materials you may need for the specific project you are working on.

Step 2: Prepare the Barrel

Once you have gathered the necessary materials, you will need to prepare the barrel. Start by removing the top and bottom of the barrel. Then, use a saw to cut the barrel into the desired shape and size. Once the barrel is cut, use sandpaper to smooth out any rough edges.

Step 3: Assemble the Pieces

Once the barrel is cut and sanded, you can begin to assemble the pieces. Depending on the project you are working on, you may need to glue, screw, or otherwise attach the pieces together. Make sure to use wood glue and screws to ensure a secure fit.

Step 4: Finish the Project

The final step is to finish the project. Depending on the project, you may need to paint, stain, or otherwise finish the piece. Make sure to use a sealant to protect the wood and ensure a long-lasting finish.

Conclusion

Crafting your own wine barrel wonders is a fun and rewarding project that can be done with minimal tools and materials. By following this step-by-step guide, you can create unique and rustic pieces that will add a touch of charm to any home.

Creative Uses for Your Wine Barrel Creations: Ideas for Home Decor and More

Wine barrels are a versatile and attractive addition to any home. Not only do they add a rustic charm to any room, but they can also be used in a variety of creative ways. From home decor to furniture, wine barrels can be used to create unique and stylish pieces that will add a touch of character to any space. Here are some creative uses for your wine barrel creations:

1. Coffee Table: Transform a wine barrel into a unique coffee table by cutting it in half and adding a glass top. This will create a beautiful and functional piece of furniture that will be the centerpiece of any room.

2. Wine Rack: Create a stylish and practical wine rack by cutting the barrel into sections and adding shelves. This will provide a great way to store and display your favorite bottles of wine.

3. Planter: Cut the barrel into sections and use them as planters for your favorite plants. This will add a touch of greenery to any room and create a unique and eye-catching display.

4. Bar Cart: Transform a wine barrel into a bar cart by adding wheels and shelves. This will provide a great way to store and serve drinks in style.

5. Wall Art: Cut the barrel into sections and use them as wall art. This will create a unique and eye-catching display that will be sure to draw attention.

6. Lighting: Create a unique lighting fixture by cutting the barrel into sections and adding lights. This will provide a great way to add a touch of ambiance to any room.

7. Furniture: Transform a wine barrel into a unique piece of furniture by cutting it into sections and adding cushions. This will create a comfortable and stylish seating option that will be sure to draw attention.

These are just a few of the creative uses for your wine barrel creations. With a little bit of imagination, you can create unique and stylish pieces that will add a touch of character to any space.Wine Barrel Wonders is an excellent resource for anyone looking to craft and use their own wine barrel creations. With detailed instructions and helpful tips, this book provides readers with the knowledge and tools they need to create unique and beautiful pieces. Whether you are a novice or an experienced woodworker, Wine Barrel Wonders is sure to provide you with the information and inspiration you need to create something truly special.